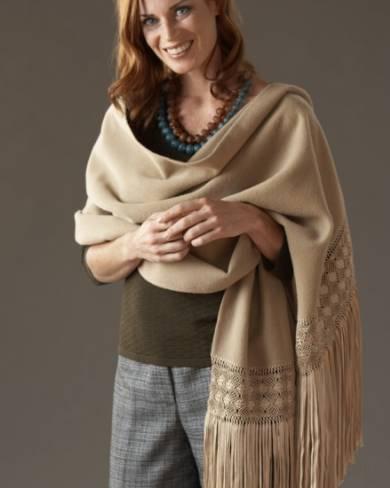
 Knotted fringe is actually quite easy to make and can be a lovely addition to any number of fashion design ideas such as on a vest, a skirt hem, or even, curtains. The first thing you must decide is whether your design project requires the addition of fringe or whether the fringe can be knotted from existing strands. You can apply the fringe trim similar to the macramé knotted fringe on this luxurious alpaca and silk shawl from the Viva Terra collection.
The second option, that of loosing weft (horizontal) threads leaving the remaining warp (veritcal) threads hanging. Measure out how long you want the fringe to be and mark that measurement with a line of stay-stitching. Then draw out the threads up to that stitching line. Decide how many threads you want to bundle together to tie in a knot. Then tie the knots and you will have a lovely fringed trim.
You will need:
- 5/8 yd of double-sided fashion fabric, 60″ wide such as woolens, cashmere, alpaca, etc.
- Yarn for fringing such as embroidery cotton, crochet pearl cotton, silk ribbon, chainette, etc.
- Crochet hook
- Darning needle
- Coordinating thread
- Heavy cardboard
CUTTING
 Cut a rectangle 60″ X 21″ from the fashion fabric.
Cut a piece of cardboard about 8″ wide and half as long as desired length for finished strands (add extra length to account for take-up of knotting for thicker yarns). Wind yarn loosely around cardboard, cut across one end when card is filled. Repeat several times and then start fringing; you can wind more strands as you need them.
ASSEMBLY
 Finish the edges of the rectangle with a narrow hem around its perimeter.
Hand-stitch a blanket stitch to the two narrow ends of the rectangle using yarn and darning needle. Use this stitching as the anchor to apply the fringe.
Follow these instructions from the Craft Yarn Council of America for knotted fringe to create a diamond pattern of knotting.
For single knot fringe, hold the number of strands specified for 1 knot of fringe together and fold in half.
With crochet hook draw folded end through space or stitch. Pull loose ends through folded section and draw knit up tightly. (fig. 1 & 2)
For double knot fringe, after completing fringe as above, turn so right side of work is facing you. Work knots in a diamond pattern as shown in diagrams to left. (fig. 3 & 4)
material source: Craft Yarn Council of America