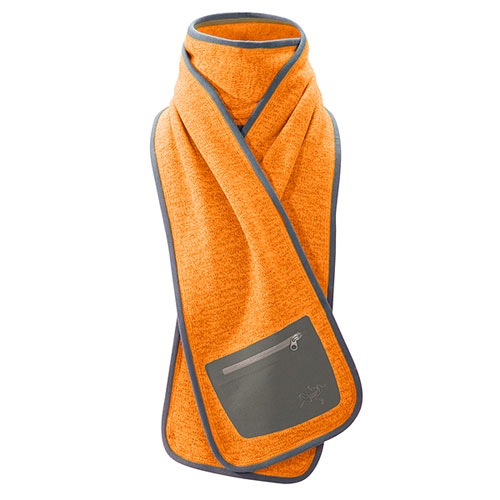
 Hit the town this fall with the unique style of the Covert Scarf. A warm cozy neck wrap like this one made by Arc’teryx™ is made with Polartec® Thermal Pro® sweater knit fleece for supreme itch-free comfort and warmth on chilly nights out. The Covert Scarf is nicely bound-finished with a zippered stash pocket laminated on it to hold house-keys and ID when you don’t want to pack a purse.
You will need:
- ¼ yd. of Polartec® Thermal Pro® Fleece Knit, 60″ wide
- 1 yd. of water-proof cotton poplin or duck, 54″ wide
- Coordinating thread
- 1 closed zipper in matching colour, 6″ long
- small piece of fusible interfacing (7″ x 3″)
PATTERN
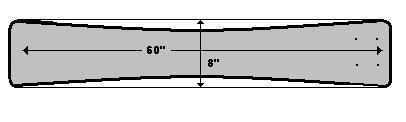
Draw a rectangle 60″ X 8″. At the center taper in 1″ on each side and blend lines gradually to reduce the bulk around your neck. At each end round the corners.
Cut out in thick pill-free polar fleece.
Draw a patch pocket 8″ X 7″ and round off the 2 bottom corners. Add ½”seam allowance all around. Cut out in poplin or cotton duck.
MAKING BIAS BINDING
Binding is a way of neatening a raw edge using a separate length of fabric, usually in a contrasting colour or fabric. The binding trim is cut on the bias as this makes it slightly easier to shape around curves. Cut out in poplin or cotton duck.
Instructions on Cutting Bias Strips
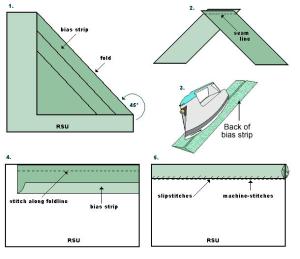 To cut bias strips fold the fabric diagonally so that a straight edge is parallel to the selvedge at a 45°angle.
Press this fold and use this crease as a guide to mark parallel lines for bias strips. (fig.1)
To join bias strips place two lengths, right sides together, right angles to each other and stitch.
Open out, press seam open and trim off the overlapping edges. (fig. 2)
Instructions on Binding the Scarf Edge
Cut bias strips 4 times the finished width of the binding required (the model shown is ½” wide).
Fold both raw edges to the centre on the back, down the length of the bias strips and press. (fig.3)
Open up one side of the binding. Place this side of the binding onto the right side of the scarf with raw edges matching and baste. (fig. 4) Machine stitch on foldline of bias binding. Do not stretch bias strip and ease around curved corners.
Fold the binding over the raw edge to the wrong side of the scarf fabric.
Pin and slipstitch the fold of the binding to line of stitches on the wrong side to encase the edge. (fig. 5)
MAKING STASH POCKET
Cut out the patch pocket in poplin or cotton duck.
 Find and mark the position where you would like the zippered opening to lie on the patch pocket. This should be on the right side of the fabric. You can put a strip of fusible interfacing on the “wrong” side of the fabric at that position, to make the opening a little sturdier.
Next, place and pin a strip of fabric for the facing (3″ X 7″) so that its center covers the pocket opening position, with right sides together. Baste in place.
Chalk a narrow rectangle that’s just a little bit longer than your zipper. Sew around this outline. (fig. 6)
Carefully cut a line through both fabrics within the rectangle, as shown at left, with diagonal cuts towards the corners. The closer you can get to the stitching, the neater the pocket’s finished appearance will be. Use sharp pointed scissors. (fig. 7)
Turn the zipper facing towards the inside, through the opening. You may want to press at this stage, so that the opening is neat and professional looking.
Center the zipper into place and baste. Using a zipper foot, topstitch around the opening to secure the zipper. (fig. 8 )
Stitch along the bottom of the facing to secure to the patch pocket. (This stitching is visible on the right side.)
Turn under ½” seam allowance all around the perimeter of the stash pocket. Press. (fig. 9)
Center stash pocket on one end of scarf and edge stitch around the pocket.

May 7, 2009 at 9:28 am
[…] Schal mit Reißverschlussfach […]
March 29, 2010 at 8:20 pm
[…] Found here! Bookmark Idea […]
July 1, 2012 at 1:03 am
[…] Fishing Vest Sturdy Tool WrapScoodie Dolphin Toiletry Bag Rain Poncho from shower curtain Boxers Covert ScarfBow TieIndoor/Outdoor Exercise MatCardigan Shoe Insulation Waistcoat/Vest Polar Fleece Scarf Pete- […]